How to Install Gravel Stabilisation Grids
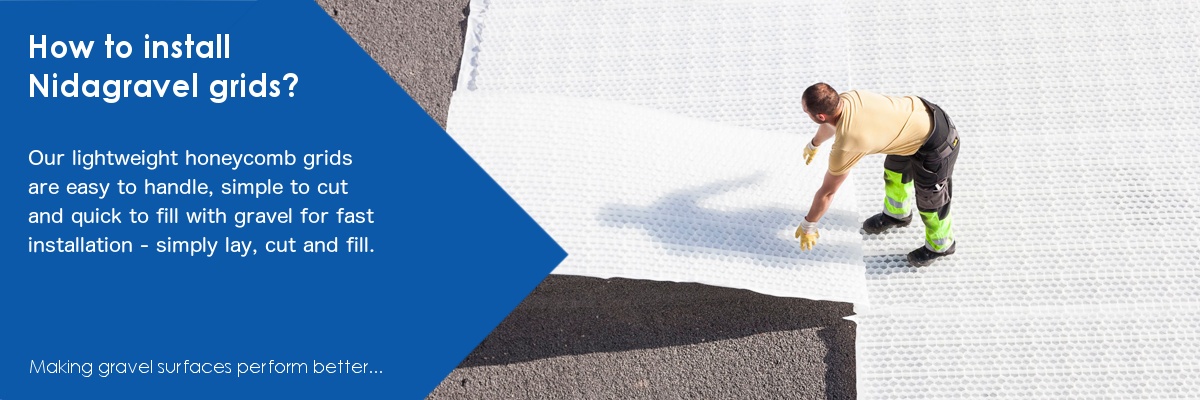 HOW TO INSTALL NIDAGRAVEL GRIDS
The Nidagravel range of gravel stabilisation grids for gravel paths, driveways and car parks are straightforward to install and provide a quick, easy way to achieve a high-performance, 100% permeable gravel surface, that is completely stable and a pleasure to use. Our gravel reinforcement grids are regularly installed by keen DIYers and self-builders for a wide range of garden, landscaping and driveway projects. In fact, it is actually quite enjoyable laying Nidagravel grids and very satisfying to fill the grids with gravel and see instantly how effective they are. For large gravel driveways and car parks or more complicated landscaping projects, Nidagravel grids are installed by professional contractors. The following information on this page of the website is a simple guide to the steps involved in laying Nidagravel drive grids from stripping off the turf and digging out the sub-base to project completion and filling the Nidagravel grids with your choice of decorative gravel. The friendly Nidagravel UK team are always on hand to answer any installation questions, so please do not hesitate to contact us. You can also find detailed answers to many installation questions in our Frequently Asked Questions section, click here to view installation FAQ's

SUB-BASE PREPARATIONS, EXCAVATIONS & GROUNDWORKS
1. Sub-base excavations
All external hard landscaped surfaces including gravel surfaces for pedestrian or vehicle use require a solid foundation. This foundation for the surfacing layer is called the sub-base. This is one of the most important aspects of any installation and is often referred to as the groundworks stage of the project. The first stage is to excavate the ground to the required depth to install the correct depth and type of sub-base material and the thickness of the Nidagravel gravel stabilisation system. All site levels are set at this point and changes to finished surface levels can also be adjusted at this stage to ensure the finished surface levels are correct. Reducing the finished levels from the existing ground levels will usually result in deeper excavations to take this change into account, similarly raising levels may require extra sub-base material to be imported into the site to make up the ground to the required level. Once the excavations have been made the sub-grade should be inspected to ensure that is suitable for the intended use and loading. It is good practice to ensure the sub-grade is firm, level and dug to the correct depth across the full area. This ensures that no sections of the sub-base will have a thinner layer of sub-base material.
2. Installation of the sub-base
Before installing the sub-base material it is good practice to lay a ground stabilising membrane or geotextile over the sub-grade. This will separate the sub-grade from the sub-base material and prevent any contamination of the sub-base material. This geotextile or membrane layer will also help stabilise the ground when loaded with sub-base material. The standard sub-base material used across the UK is usually a primary aggregate and is often a granite or limestone Type 1 MOT 40mm to dust specification. This specification of sub-base material contains a range of aggregate sizes and fines and generally compacts well to form a stable base on which to install the Nidagravel gravel stabilisation system. Other sub-base grades and materials are available and can also be successfully used, this includes a range of recycled products. Where greater levels of permeability are required for drainage or as part of a SuDS compliant system, different sub-base materials are specified, usually, these sub-base materials contain a lower percentage of fines or small particles to increase the void size between the pieces of aggregate and therefore increase the sub-bases ability to drain more freely. Once the sub-base material has been installed it is then compacted to form a well-consolidated base. For average ground conditions, the following sub-base depths are generally accepted as being suitable for their applications:
It is considered good practice to install deeper sub-bases in layers to achieve maximum compaction of the sub-base material. For example, a standard residential driveway may have a 150mm deep sub-base, that is laid down in 2 x 75mm layers. The first layer is installed and compacted and then the second layer is installed and compacted.
3. Installation of the bedding layer
With the sub-base complete, in the UK, we recommend installing a 10mm - 15mm bedding layer of sharp or grit sand. This is used to blind off the coarser sub-base material and fill in any voids in the surface of the sub-base. It also enables the final levels to be achieved. The bedding layer is then compacted and left ready to receive the Nidagravel gravel grids.
NOTE: No sub-base required / Working off an existing concrete slab or tarmac base
Nidagravel gravel reinforcement grids can be used successfully on top of an existing base, such as a concrete or tarmac driveway to create a new stable gravel surface. In fact, placing gravel within Nidgavel grids is the only way that gravel can be effectively laid over a hard surface. This can greatly reduce installation costs and offers a cost-effective driveway refurbishment solution. When installing Nidagravel grids on top of an existing concrete or tarmac surface the following points must be taken into account:

DIFFERENT EDGING OPTIONS FOR GRAVEL PATHS & DRIVEWAYS
Whilst it is not always essential to install an edging, subject to the material of the adjoining surface, it is often desirable both visually and practically. Any edging unit or edge restraint can be used with Nidagravel. There is no best edging option as such, it is dependent on the application and the design of the space. The following edgings all work well with Nidagravel products; metal and aluminum edging, brick and stone setts, kerb units, and treated timber edging or sleepers. Where Nidagravel is laid against a building there is no need for an edge restraint to be used. We do recommend that edgings be installed for driveway projects and applications that are subject to vehicular use and heavy loads as the edging will support the sub-base material at the outer edge and ensure there can be no movement.
INSTALLATION OF NIDAGRAVEL GRAVEL STABILISATION GRIDS
1. Laying Nidagravel gravel reinforcement grids
With the sub-base, bedding layer, and edgings complete it is time to start installing your Nidagravel grids. Simply lay your Nidagravel sheets onto your prepared base. There are two overlaps of membrane, along one short side and one long side of each sheet. These should be folded flat and the next sheet laid on top and butted up to the previous sheet laid. It is good practice to stagger the sheet joints in a stretcher bond style like brickwork, but it is not essential to the performance of the product. Nidagravel gravel grids gain their full strength when loaded or filled with gravel and heavy loads must not be moved onto the sheets until filled. It is also recommended to lay full sheets in the most frequently trafficked areas. When laying out your Nidagravel grids, depending on the size of the driveway or path you can lay all the sheets together and fill with gravel or you can lay one section at a time, fill the grids with gravel and then move onto the next section. There is no right or wrong way when it comes to deciding how many sheets to lay before filling with gravel, this is often dictated by the size of the project, the shape, access, and how the gravel will be delivered to site.
2. Cutting Nidagravel honeycomb grids to fit
Once the main body of the surface area of the installation has been laid, the Nidagravel grids can be cut to fit. Grids that have been laid towards the outer edges may need to be trimmed to size to follow the line of your edgings. Another great benefit of Nidagravel gravel grids compared to some other grids is that they are really quick and simple to cut in situ using an angle grinder, cut-off saw or hand saw. This makes trimming sheets to size and following curved edges really easy to do. Nidagravel stabilisers can easily be cut to follow any angle, curve or radius. Off-cuts of a reasonable size can be used towards the edges of an installation to reduce material wastage and cost.
3. Filling Nidagravel driveway grids with angular gravel
Nidagravel 129, 130 and 140 gravel stabilisers can be filled with any decorative aggregate, chipping or gravel. We recommend using angular-shaped decorative aggregates to fill our gravel trays as this type of gravel works best with our gravel grid system. Angular shaped gravels naturally interlock well and when combined with Nidagravel grids you will maximize the stability of your gravel path, driveway or car park. There is a wide range of angular gravels available throughout the UK from a range of suppliers from national builders merchants like Travis Perkins, Jewsons, Keyline and Buildbase. Angular gravels are also available from many local aggregate suppliers, quarries and garden centers. The gravel required to fill Nidagravel grids is not specialist gravel. When you are filling the Nidagravel grid system it is important that you follow our guidelines regards the maximum size of gravel to use. For Nidagravel 129 and 130 we recommended 10 - 12 mm as being the maximum gravel size. If you are using graded gravel then a gravel size range between 4 - 14mm is acceptable. The minimum size we recommend is 6mm when using single-size gravel. For Nidagravel 140, which has deeper cells and is our most robust gravel grid, it can accommodate a slightly larger maximum gravel size. The maximum size gravel for Nidagravel 140 is 20mm. The gravel sizes as described here will contain a range of gravel particle sizes. This size of gravel is ideal for filling the thousands of 49mm diameter cells that will cover the surface of a typical grid installation with minimal voids, ensuring the gravel beds down and compacts well within the honeycomb cells, whilst still having excellent drainage characteristics. The sheets are designed to be unseen and a 20 - 25mm deep surface layer of gravel is used to cover the surface of the Nidagravel gravel grids. This surface layer should be applied consistently and evenly across the surface of the gravel grids. Once the gravel surface is in use, some further compaction and natural settlement of the gravel with occur over an initial 2 - 4 week period to leave a surface covering of 10mm - 15mm of gravel. It is important to maintain this surface covering to ensure maximum performance of the product and longevity.
Maximum slope gradients for Nidagravel grid driveways
We recommend that Nidagravel grids can be used on gradients up to 15%
Click here to find out more and use our Gradient Calculator
Nidagravel gravel retention grids for pathways
If you are installing curved or straight gravel paths use Nidagravel 129.
Nidagravel gravel stabilisers for driveways & car parks
If you are installing a standard driveway use Nidagravel 130.
If you are installing a heavier use driveway or car park use Nidagravel 140.
If you wish to use a 20mm gravel use Nidagravel 140.
WATCH OUR HONEYCOMB GRAVEL GRID INSTALLATION VIDEOS
Video 1 - How to install a new gravel pathway using Nidagravel gravel stabilisation grids
This video shows how straightforward it is for customers to create a new garden path using our gravel grids. The gravel grid used in this video is our small format grid, Nidagravel 129, which is ideal for garden paths as it easy to handle and the smaller sheet size of 0.96 SQM lends itself well to standard pathway dimensions. Nidagravel 129 can also be used for to stabilise gravel parking spaces, extending your driveway or creating small driveways up to approx. 50 SQM in size. For larger driveways over 50 SQM, it is usually a better option to use our large-format Nidagravel 130 and 140 grids for speed of installation.
Video 2 - How to install a new gravel driveway using Nidagravel gravel stabilisation grids
This video shows a typical gravel driveway project and the steps to follow to prepare the driveway base and install the Nidagravel grid surface. We recommend both our Nidagravel 130 and Nidagravel 140 grids for gravel driveways depending on which size gravel you would like to use. Both of these gravel trays are the same size and each sheet covers 2.4 SQM but the thicknesses are different. Nidagravel 130 is 30mm thick and is ideal for gravel that is 10 - 12mm in size, or if you prefer the look of slightly larger gravels, then you can use a 10 - 20mm gravel with our Nidagravel 140 grids which is 40mm thick and the deeper cells can accommodate this larger gravel size.
Video 3 - The benefits of installing Nidagravel honeycomb gravel stabilisers
This is our original Nidagravel video and it starts with the crunching noise made by someone walking across a gravel surface, which we absolutely love. The video tells you all about Nidagravel gravel stabilisation grids, including how they work, the benefits of using Nidagravel gravel stabilisers and also details of the manufacturing process, showing how the membrane is attached, how the gravel grids are compression tested and the quality control systems in place. Its also shows a Nidagravel driveway grid installation project in progress and the steps involved accompanied by a slightly groovy 1980's soundtrack, which we also love. This is because Nidplast pioneered the development of honeycomb grids for gravel stabilisation and we really are the original gravel grid manufacturers!
Customer Reviews
After you have watched our gravel reinforcement grid 'how-to' videos, please take a moment to read what just a few of our satisfied customers from across the UK have to say about how effective our Nidagravel grids are at stabilising their gravel paths and driveways and about our delivery and customer service.
Click here to read our customer reviews
Nidagravel UK - Making gravel surfaces perform better...